- Log in to your Bluehost Account Manager.
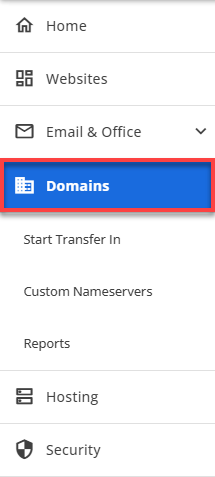
- Navigate to the side menu on the left and click Domains.
- Make sure that the correct domain is selected.
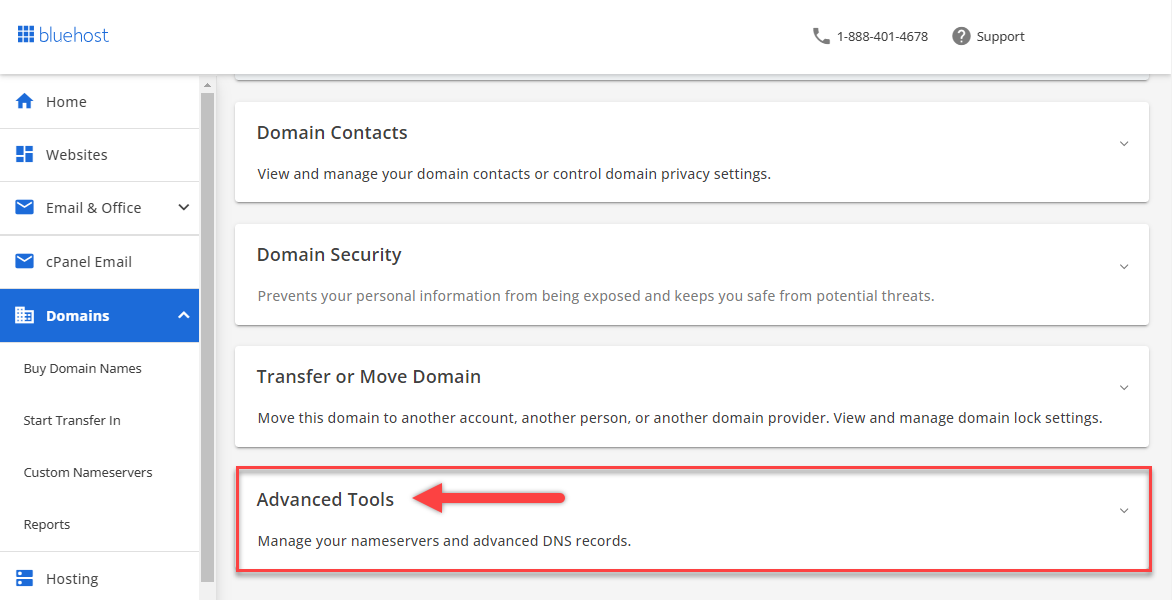
- Scroll down to the Advanced Tools section and click on it.
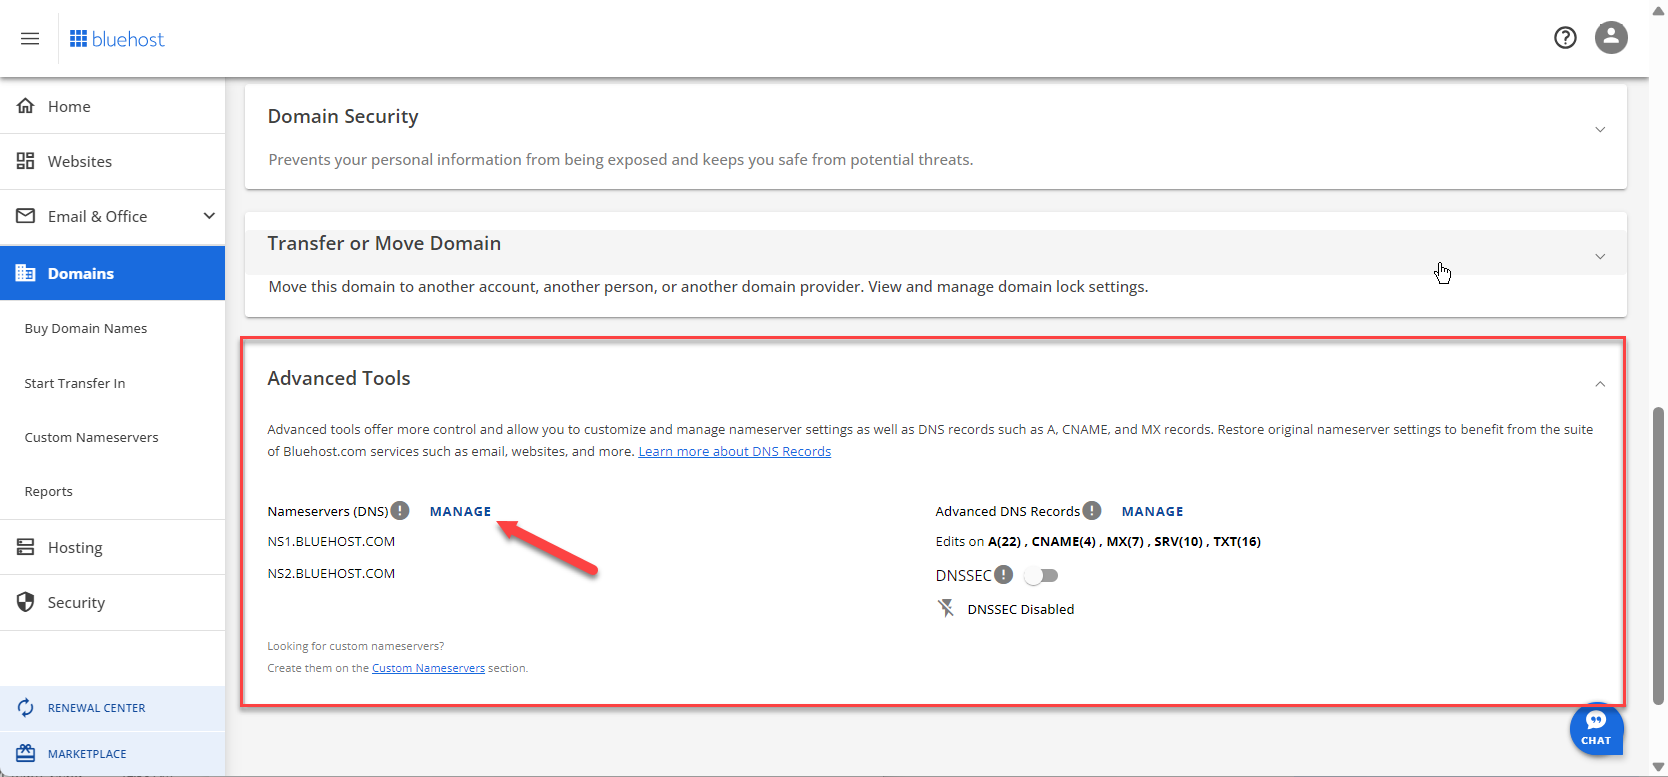
- Locate the Nameservers DNS option and click the MANAGE button.
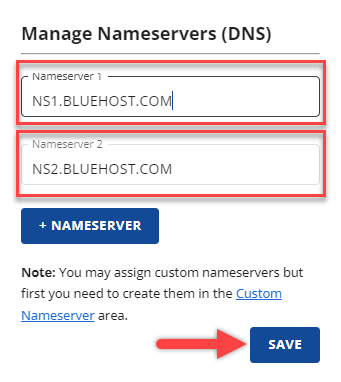
- A pop-up window titled Manage Nameservers (DNS) will appear. To proceed, please click on the Continue button.

- Input the new settings.
cleo.ns.cloudflare.com eva.ns.cloudflare.com - Click the Save button to ensure that any changes you have made are saved.